
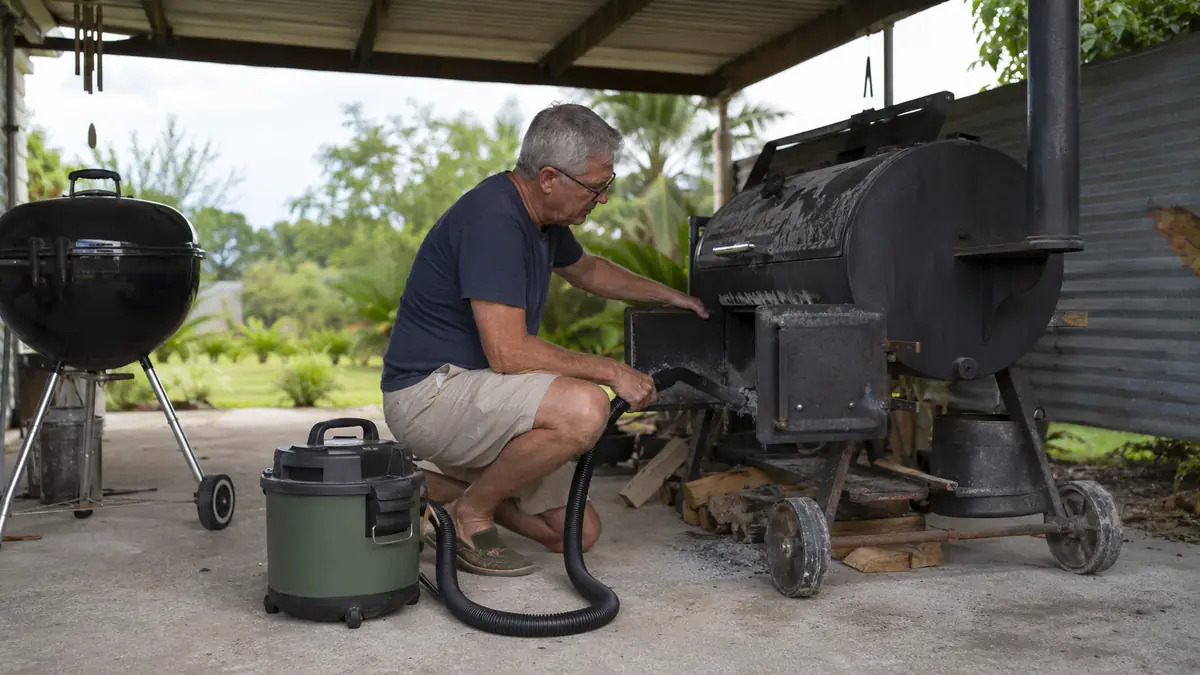
An offset smoker firebox does not clean itself, and after fourteen months of running my PowerSmith ash vacuum on a secondhand stick burner out back, I've settled into a routine that clears the whole firebox, cook chamber, and smokestack in about twenty minutes without breathing a cloud of fine ash or gambling with a stray coal. This is that routine, written out step by step, the same order I walk my neighbor Hollis through every time he borrows the vacuum for his own offset. If you're new to a stick burner, or new to owning a dedicated ash vacuum instead of dragging a dustpan and a shop vac out to the patio, this is exactly what I do, including the one rule I never skip no matter how badly I want the firebox ready for the next cook.
I run this offset alongside my 22-inch charcoal kettle, and between Sunday cooks for Kara, Beto, and the grandkids and the humidity we get a few blocks off Ocean Drive here in Corpus Christi, ash management is not optional. It builds up fast, it clumps in wet air, and if you get sloppy about it your fire runs dirty and your airflow suffers. None of the seven steps below are complicated. But the order matters, and step one is not negotiable, so read that part even if you skip the rest.
Doing This With a Dustpan and a Prayer? There's a Better Way.
The PowerSmith ash vacuum is built specifically for cooled ash and embers, not repurposed from sawdust duty like a standard shop vac. It's the tool this entire routine is built around. Check today's price and current availability on Amazon.
Amazon Check Today's Price on Amazon →Step 1: Confirm the Ash Is Completely Cold, No Exceptions
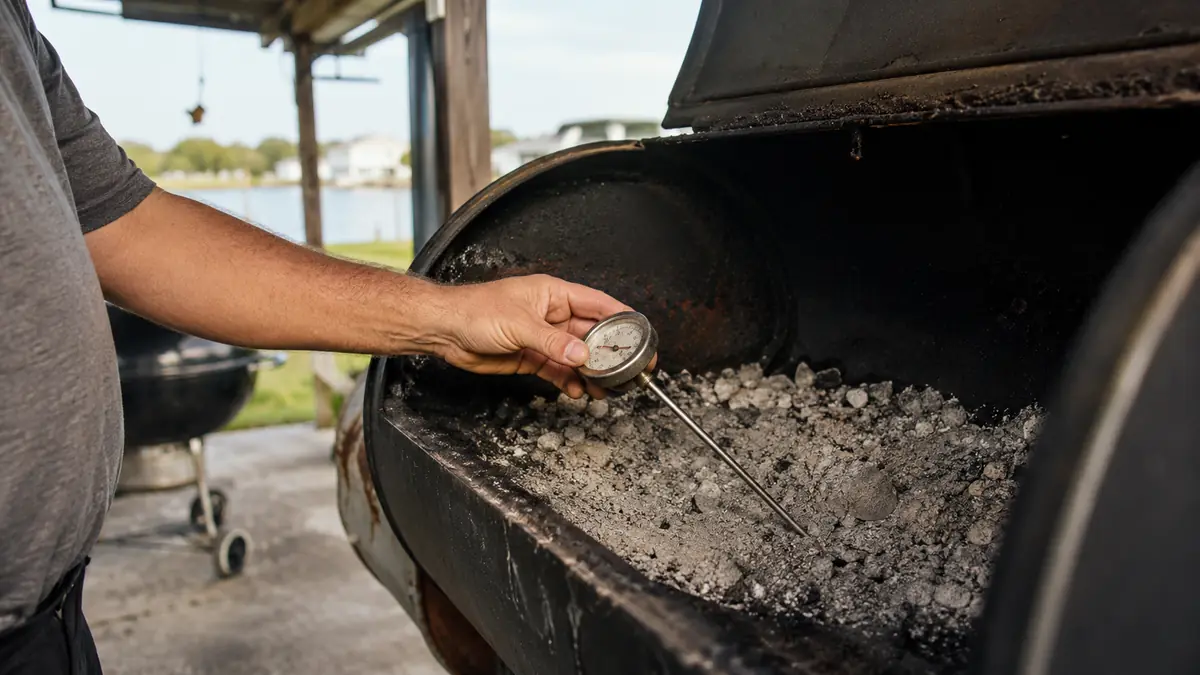
This is the step that matters more than every other step combined, and I mean that plainly, not as a scare tactic. Ash insulates heat instead of releasing it. A pile that looks gray and dead on the surface can have a live coal sitting an inch under that layer, holding real heat for far longer than most people expect, especially once humidity gets involved and slows how fast everything cools. An ash vacuum does not change that fact. It is not a license to vacuum warm ash. It is a safer tool for handling ash that is already fully cold, and the difference between those two things is where fires start.
My rule is a minimum of twenty four hours after the last coal goes out, and out here I usually give it closer to forty eight, because damp ash holds heat differently than dry ash does. Before I ever bring the vacuum near the firebox, I push an old meat thermometer down into the deepest part of the ash pile, the same one I retired from cooking duty years ago. If it doesn't read close to room temperature, I close the firebox door and walk away for another day. Hollis has teased me about being overly cautious about this, especially when he's hoping to fire the offset back up for a Saturday cook. I don't care. A vacuum full of hot embers and fine dust is a real fire risk, and no amount of convenience is worth that. Check it, don't guess at it, and only move on to step two once you're sure.
Step 2: Clear the Firebox Floor
Once the ash is confirmed cold, the firebox floor is where I start. I open the firebox door all the way and use the rigid metal hose tip to work the vacuum flat along the floor, pulling ash out of the corners where it likes to pile up against the grate legs. The PowerSmith's rigid tip earns its keep here. A soft flexible hose tends to bend away from the ash instead of scraping under it, which is exactly the problem I had with a regular shop vac attachment before this.
Full-size splits leave behind more than fine powder. There's usually some clinker, that fused chunky residue that forms when mineral content in the wood bakes hard, and small charred chunks that never fully broke down. The vacuum handles the fine ash easily. Larger clinker pieces sometimes need a light tap with a poker to break them up first so they don't just roll around in front of the hose tip. I go over the floor twice, once for the bulk of it and a second pass along the edges and under the grate supports where fine ash likes to hide.
Step 3: Work Through the Cook Chamber and Grates
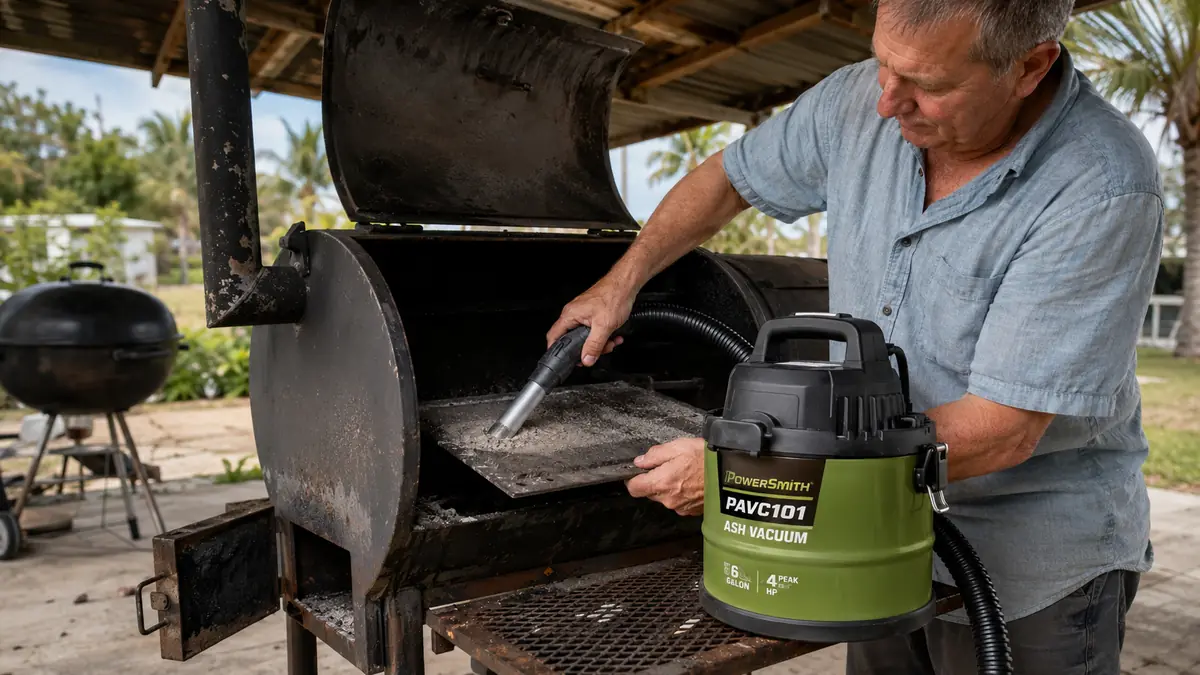
The cook chamber gets less ash than the firebox, but it's not nothing, especially on a stick burner where fine ash drifts through the smoke path over hours of cooking. I lift the cooking grates out first and set them aside, then run the vacuum's crevice attachment along the chamber floor to pull up what's settled there. Anything stuck or crusted, I leave alone at this stage. That's not ash, and I'll get to why that matters in a minute.
For the grates themselves, I don't run the vacuum directly on them if there's any grease residue at all, which brings me to the biggest thing worth understanding about this whole routine. An ash vacuum is built for dry, cooled ash and embers. It is not a degreaser and it should never touch anything wet or greasy. If the grates need that kind of attention, a grill brush and warm soapy water handle it separately, before or after the ash work, never mixed into the same pass with the vacuum.
Step 4: Get Into the Smokestack and Baffle Plate
This is the step most people skip, and it's the one that quietly wrecks your fire control over time. The baffle plate, the piece of metal that directs heat and smoke from the firebox into the cook chamber, collects a surprising amount of fine ash along its underside and edges. If your offset has a removable baffle, lift it out and vacuum both sides along with the shelf it sits on. If it's fixed, work the rigid hose tip as far under and around it as it'll reach.
The base of the smokestack collects ash too, more than you'd guess given how far it sits from the firebox. I run the hose a few inches up into the stack opening from below, just enough to clear what's settled at the base, without trying to snake it all the way up the pipe. A stack that's choked with ash restricts your draft, and a restricted draft is what makes a fire run smoky and stall out on temperature, the kind of problem people usually blame on the wood or the weather when it's actually just buildup nobody vacuumed out.
Step 5: Know What Not to Vacuum
I've mentioned grease already, but it's worth its own step because getting this wrong is how people damage a vacuum or create a real hazard. Never run the ash vacuum on anything wet, greasy, or damp, that includes drippings, condensation, or ash that got rained on before you got to it. Moisture inside the canister or filter doesn't just reduce suction, it can clump into a paste that's a chore to clean out and, mixed with any residual heat, is not something you want trapped inside a sealed canister.
Large wood chunks and unburned splits are the other thing to leave for your hands, not the hose. A big chunk can jam the hose tip or get pulled partway in and stall the motor. I toss those aside by hand before I start vacuuming, along with any metal hardware, screws, or grate clips that work loose over time, which happens more than you'd think in salt air. I go through the full comparison of what a dedicated ash vacuum handles versus a general shop vac, including where each one falls short, in a separate piece on ash vacuum versus shop vacuum for grill cleanup.
Step 6: Empty the Canister Into a Metal Container
Once the firebox, chamber, baffle, and stack are clear, I take the vacuum to a spot away from the house and empty the canister into a metal container with a lid, never a plastic trash bag or bin. This matters even when you're confident the ash going in was cold, because a canister full of accumulated ash from a whole firebox holds heat differently than a single scoop would, and a plastic bag melting or scorching against a pile of ash you thought was safe is not a risk worth taking for the sake of convenience.
I keep a dedicated metal ash bucket with a tight lid on a shelf near where Beto helped me build the patio lean-to a couple years back, and I let a full canister's worth sit in that bucket, lid on, for another day or two before it goes anywhere near the regular trash or a compost pile. It's an extra step, but it costs almost nothing and it closes the loop on the same caution that started this whole routine back at step one.
Step 7: Clean the Filter and Wipe Down for Rust
Last step, and the one that's easy to skip once the firebox looks clean. I tap the PowerSmith's filter out over the same metal bucket after every offset clean-out, knocking loose ash off before it clumps. Out here in the humidity, fine ash clumps fast instead of staying loose and powdery, and a clumped filter loses suction quickly. During our muggiest stretches I wash the filter every few weeks and let it dry completely before it goes back in, because a damp filter sealed back into the vacuum is its own small problem waiting to happen.
Then I wipe down the firebox interior, the hinges, and any exposed hardware with a light coat of oil, the same habit I've had to build for every piece of metal I own since moving a few blocks off the water. Salt air doesn't care that you just cleaned something, it starts working on bare metal almost immediately. A few minutes with a rag and some oil after the ash work is done saves me from fighting rust on the firebox door and the grate hardware later, which is a much bigger job than running a vacuum ever is.
What Else Helps
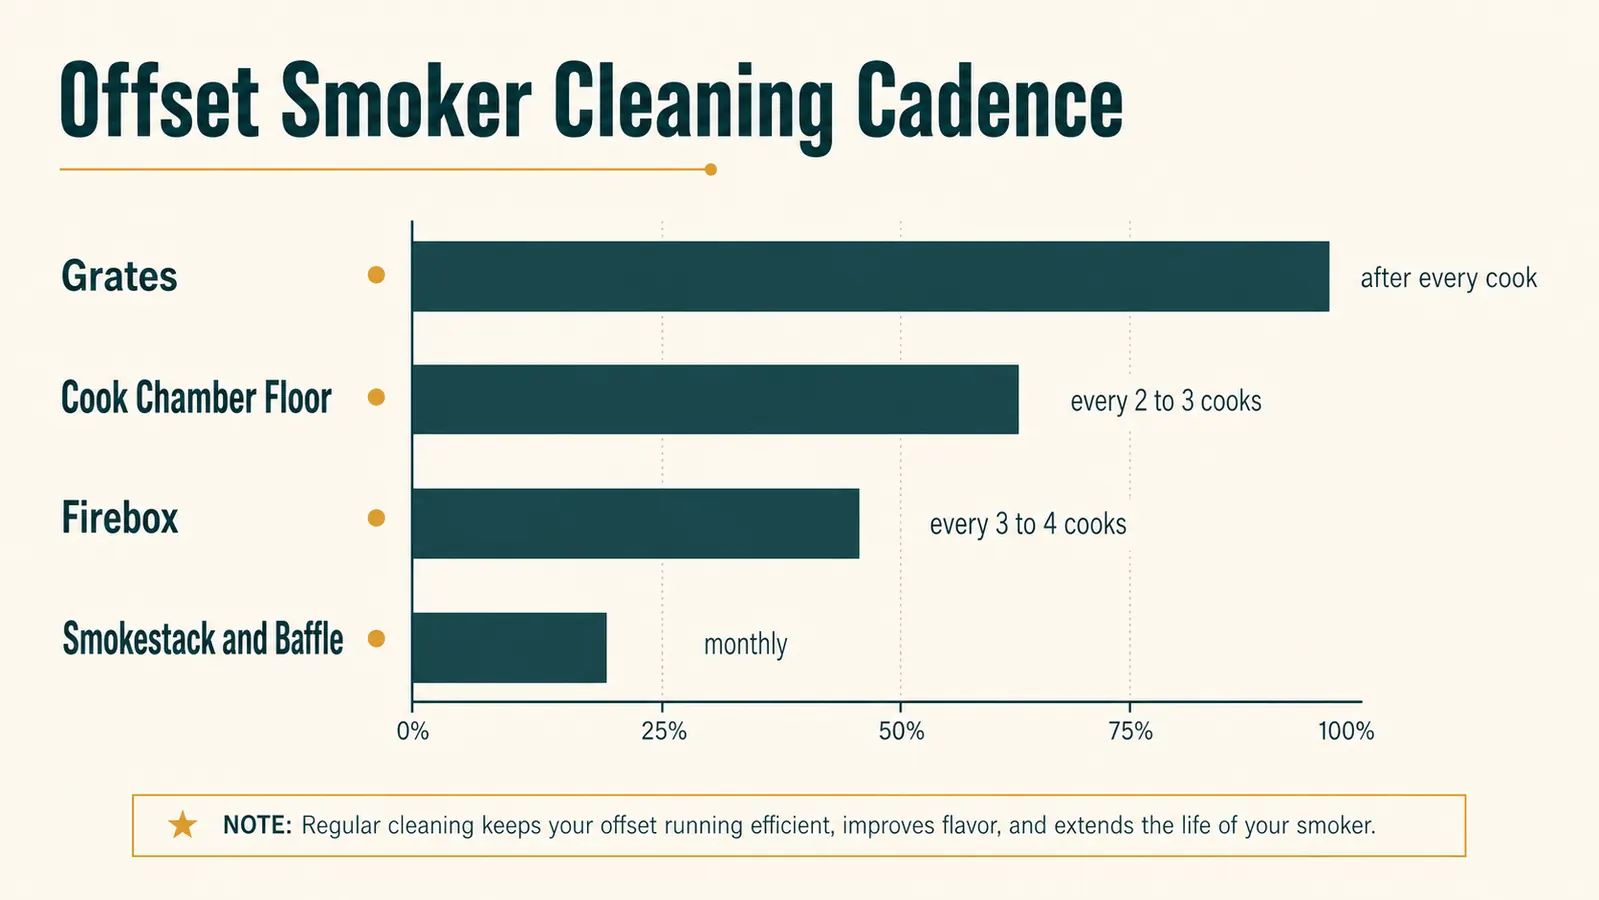
Cadence matters more than most people think. I clear the grates after nearly every cook since that's quick, do a full cook chamber pass every two or three cooks, and save the complete firebox, baffle, and stack routine for every three or four uses on the offset, sooner if I notice the fire running sluggish or smoky for no obvious reason. The most common mistake I see, including a few I've made myself, is vacuuming on a schedule instead of vacuuming when the fire tells you it's time, and skipping the filter maintenance until suction drops off a cliff instead of staying ahead of it. If you want the fuller case for why this tool earns a permanent spot in a grill shed instead of getting hauled out twice a year, I laid it out in 10 reasons an ash vacuum belongs in your grill shed, and if you want the long view on how the PowerSmith itself has held up for me, that's in my season-long review of the PowerSmith ash vacuum.
The vacuum doesn't make the safety call for you. It just makes doing the job right fast enough that you actually do it, instead of putting it off until the firebox is fighting you.
Ready to Stop Fighting a Choked Firebox?
This whole routine, from the firebox floor to the baffle plate to the filter, comes together a lot faster with a vacuum built for the job. Check today's price on Amazon and see if the PowerSmith is in stock.
Amazon Check Today's Price on Amazon →